
Before you get started, it’s important to know that this is a useful tool that will help you plan all your social media content. This same document will also serve as a guide for the design team to create the visuals. In summary, this document will help you:
- Organize and plan your content in a structured way.
- Provide clear guidelines for the design team to create the corresponding assets.
In the following link, you will find a sample template. If necessary, you can request it from the marketing department or use it as a basis to create your own. LINK HERE
This is how the document will look. I know it may seem large and a bit chaotic at first, but it will help you have everything clear. Whether you are the one scheduling or your team is, you’ll have all the information organized and will know exactly which copy to use for each social media platform.
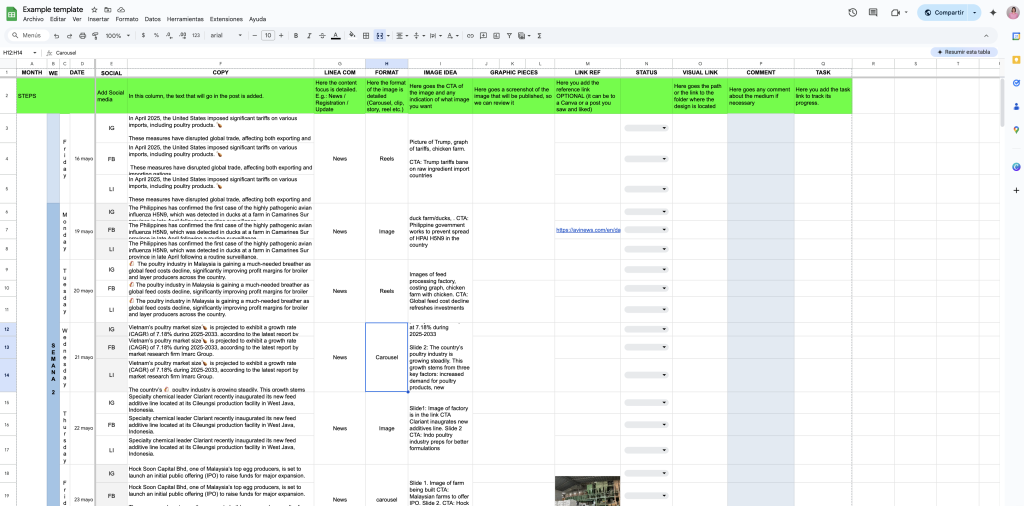
Now, let’s get started. What goes in each column.
- The first three columns are for the month, the week, and the date — this part is simple, but very important. It helps you understand the posting frequency and exact publishing dates. Make sure to complete this document at least fifteen days in advance. Keep in mind that you’ll also need to account for the time required to send it to the design team via the task platform — we’ll go over that in more detail later
- The column labeled ‘Copy’ is where you should write the exact text that will be posted on social media.
- On Instagram, do not include any links, as they are not clickable. Instead, use a call to action (CTA) inviting users to visit the link in the bio.
- On Facebook and LinkedIn, make sure to include the link directly in the copy, as it will be clickable on those platforms.
- On all platforms, remember to use emojis (without overdoing it) and include around 3 relevant hashtags to boost reach
- In the next column, called ‘Communication Line’, you should specify the type of content. For example:
- ‘News’ if it’s a company update
- ‘Technical’ for specialized content
- ‘Engagement’ if it aims to generate interaction
- ‘Interview’ if it features a conversation with someone, etc.
- This classification will help you have a global overview of what’s being published, ensure content variety throughout the month, and keep everything aligned with the company’s overall marketing strategy.
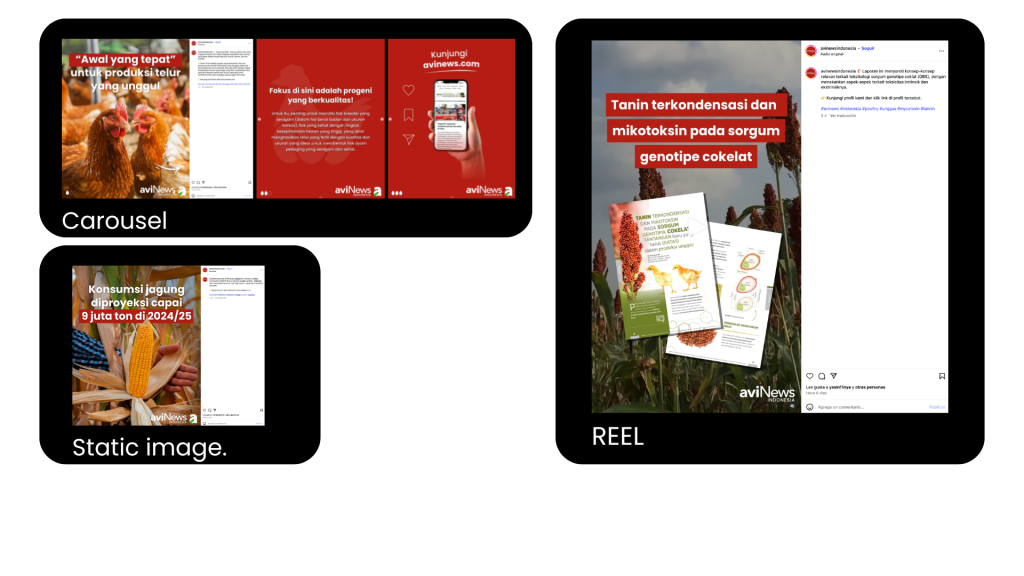
- In the next column, called ‘Format‘, you should specify the type of content: whether it’s a static image, a carousel, a reel, etc. This information will serve as a guideline for the designer, helping them understand how to create the design based on the required forma
- Important: There should be at least two reels per month. Make sure to vary the formats so it’s not always just static images — using different formats helps keep the content dynamic and engaging.
5. In the “GRAPHIC PIECES” column, you should add a screenshot or preview of the design once the design team delivers it to you. This will help you clearly identify which image corresponds to each piece of content, especially if you or someone on your team is responsible for publishing, to avoid mistakes.
6. The following columns are optional:
- The ‘Comments’ column is for leaving any additional notes or instructions you consider important
- In the ‘Reference Link’ column, you can add a link to a design you like and want to use as a reference.
- The ‘Status’ column is for indicating the status of the content, such as whether it’s already published or if you’re waiting to receive the designs.
7. The ‘Task’ column is where you should place the link to the task assigned to the design team. You should create this task every fifteen days, once you have the plan ready. This column is optional, but it’s recommended to have the link saved and easily accessible to properly track the task.
Another important function of this document is that it also serves as a guide for the design team, helping them understand how each graphic piece should be created.
Now, how do you create a task in the Agrinews platform? Below, I’ll walk you through the step-by-step process.
Below is a step-by-step guide to help you create the task.
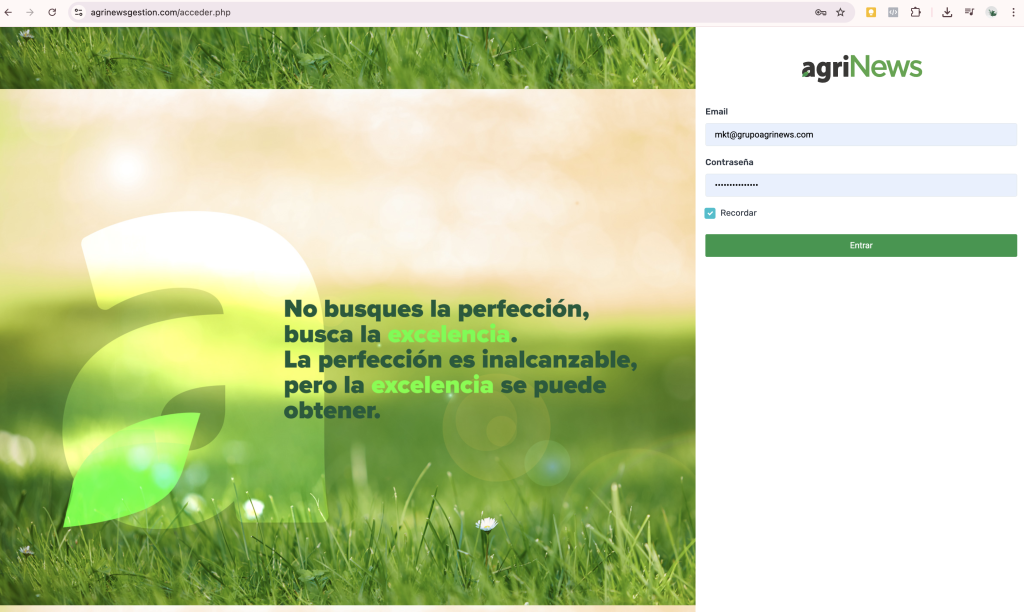
First, log in using your username and password. If you don’t have an account yet, you’ll need to request one from the programming team.

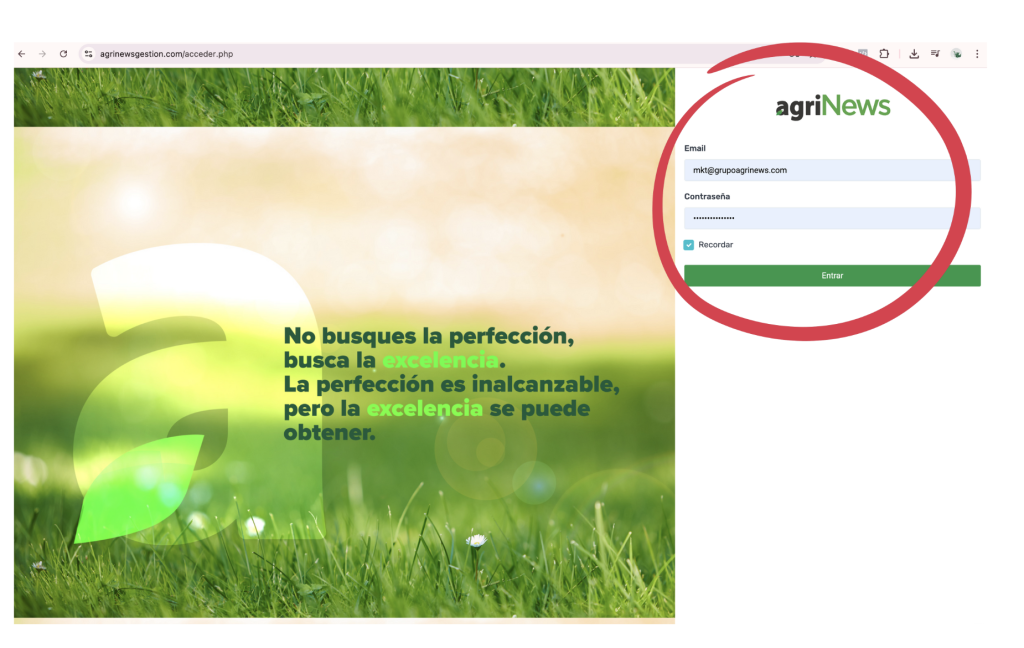
Once you’ve logged in, your screen will look like this. You’ll need to click on where it says ‘Request Task’.
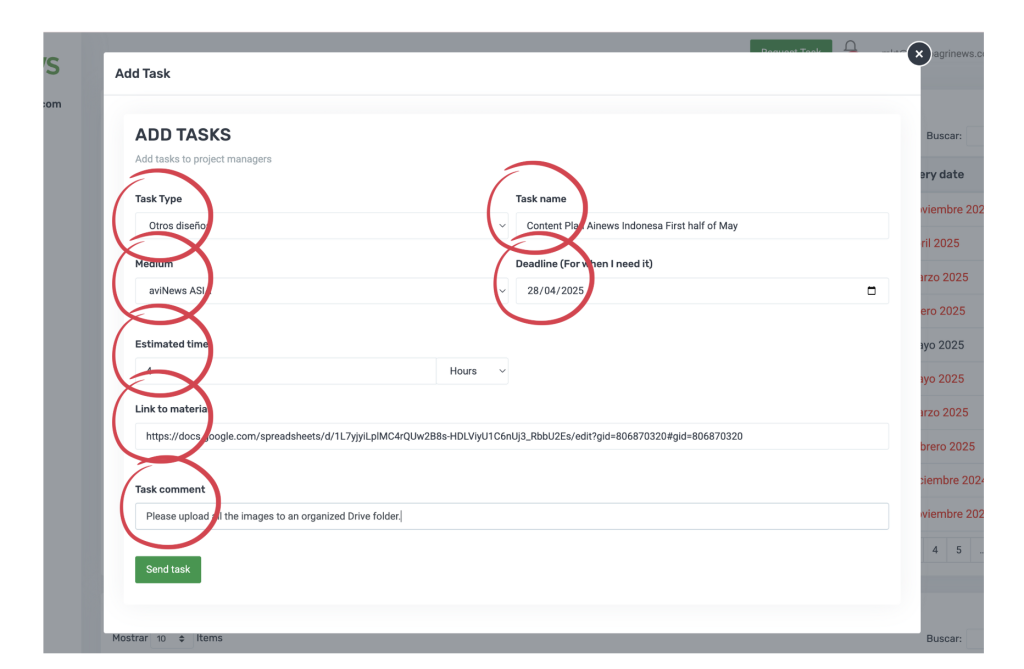
A pop-up window will open.
- In the “Task Type” field, you can leave “Other designs” selected.
- For the task name, specify the platform and what the content refers to.
- In the “Medium” field, indicate which mediun the piece is for (e.g., avinews, nutrinews).
- For estimated time, you can enter 4 hours.
- In the “Material Link” field, paste the link to the planning document.
- The comments section is optional — use it if you want to add any additional instructions.
- Setting a clear deadline is crucial: make sure to allow enough time for the design team to work on the pieces, for you to review them, and to schedule the posts on time
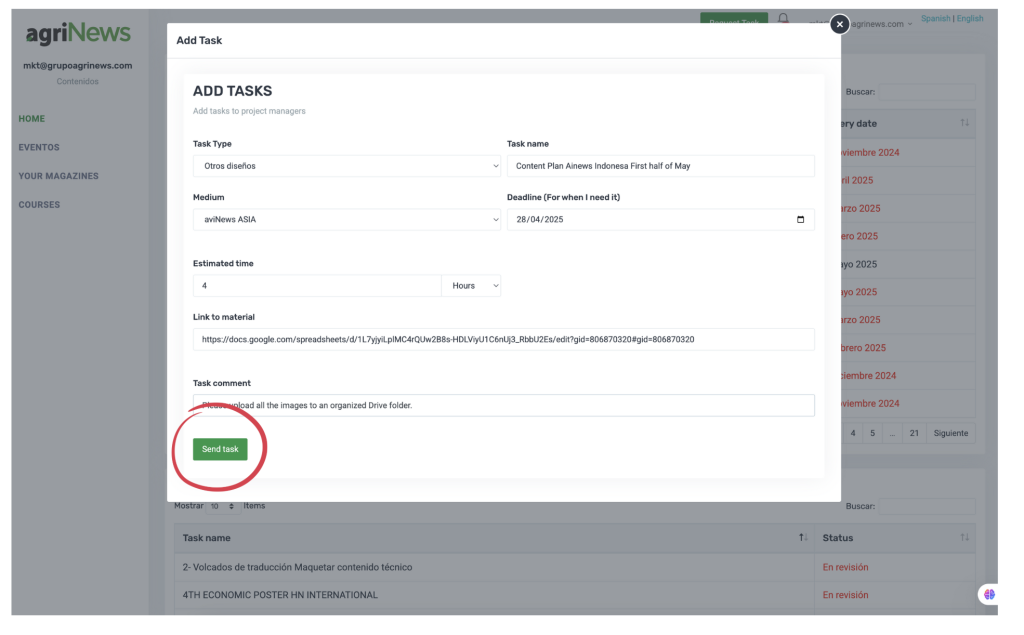
Once you have filled out and reviewed all the fields and everything is correct, click “Send Task” to submit the task.

To track the task and save the link, click on “Search”, type the task name, and then click to find it.
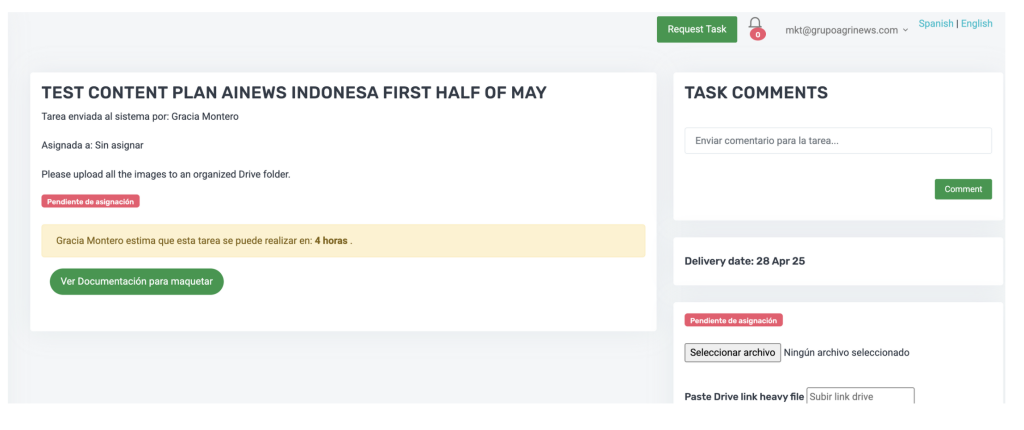
Once you click on the task, a summary of what you submitted will open. This is the link you should save to track the progress.
And that’s it! Once the task is uploaded, the design team will work on it, and you’ll be able to organize and complete the content calendar. If you have any questions or something isn’t clear, you can always reach out to the marketing team.


