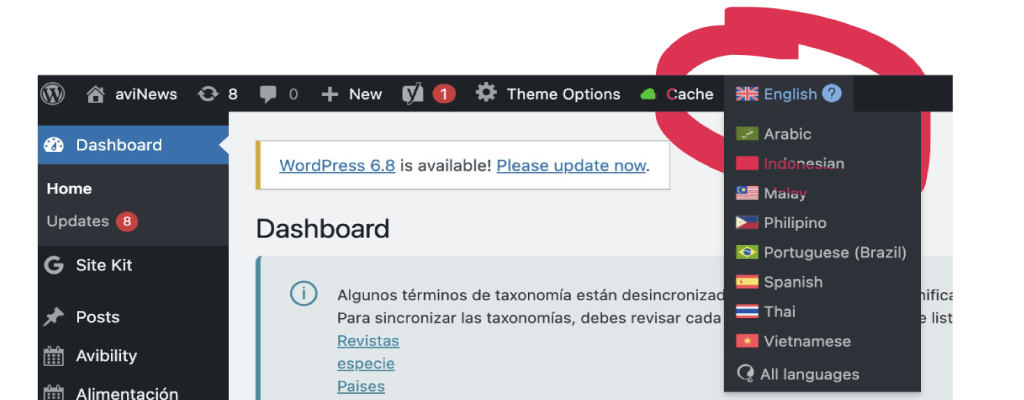
Users must first access the content through the interface in which the original language was created. Please make sure to select the correct language interface first—generally, this will be English.
Step 2 Open the right Post Type
You can find your content in either the standard ‘Posts‘ section or in one of the Custom Post Types such as ‘Products‘, ‘Reports‘, or ‘Videos‘.
In most cases, the content will be under ‘Posts’.
Once you’ve entered the ‘Posts’ section, the part we’re interested in is where the language flags appear.
It can often be helpful to reorganize your screen layout for better visibility.
Step 3 Find the Content
Find the content you want to translate — searching with just one word is usually enough.
Step 4 Create the Translated Post
Create the new post by clicking on the plus icon corresponding to the desired language. There are two methods:
Method 1: From the summary view (list of posts), click the plus icon for the language. Method 2: Click into the post, then create the translation from within the content editor.
Method 1 From the Post Summary
Method 2 Inside the Post
Step 5 Overwrite Options
Start generating the Post
Choose option “Overwrite with…”
Click in button “Translate Separately”
VERY IMPORTANT You must choose this option. If you forget it, your current translation will be affected if the original post is changed.
Start to translate
Step 6 Taxonomies Translation
The original taxonomies should be automatically pre selected.
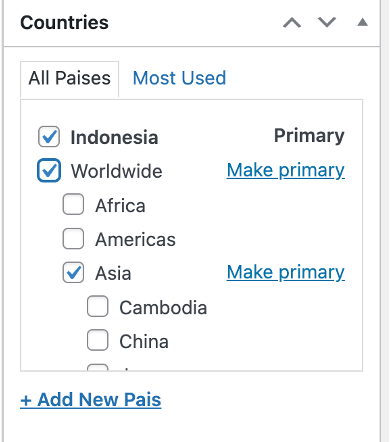
Special Focus about Countries taxonomy
Check if the “countries” taxonomy are correctly selected. From now you will have to click on Worldwide if you want to have your post shown in the global page. And after you have to click on the global region (Europe), the zone (South Asia), and the specific country (Indonesia).
Keep in mind that when you edit or translate the post, the previously selected countries appear at the top.